Interface Continued: Grasshopper for Beginners (5)
by Tuğrul Yazar | December 21, 2022 19:19
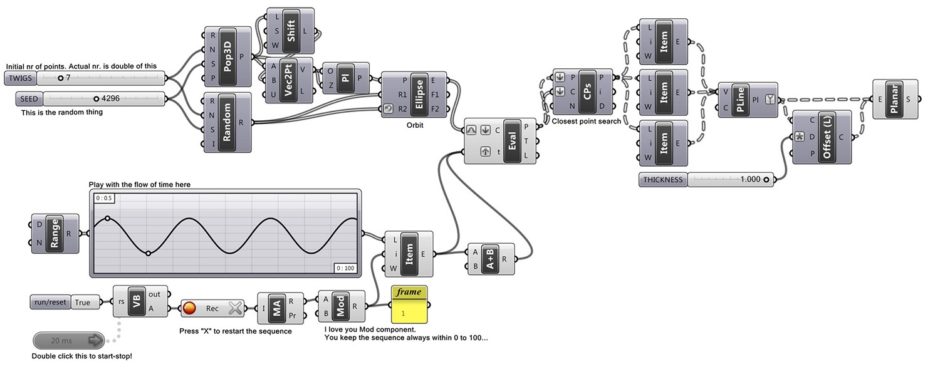
In this 5th episode of Grasshopper[1] for Beginners, the interface continued by exploring the interface of Grasshopper[2]. With the help of these two methods (tabs and search box), we can find the components. We can select them with the left click and place them on the canvas with the left click again. Now take random components and try to place them on the canvas with both methods. Therefore, components with different functions are the building blocks of GH definitions. The basic usage of GH is to create diagrams that we can read from left to right. Thus, we can do this by placing the components on the canvas and establishing the relationships (links) between them. A typical GH definition looks like the one below.

In the figure above, we can see some components and the links that associate them with each other. Some of the connections are in the form of thin solid lines, and some of them are thicker dashed lines. Each one originates from the right side of one component and connects to the left side of another component. Links always come from letter-like symbols on components. Sometimes a component has more than one connection attached. Moreover, some components are not like the others, there are ruler-like ones, yellow colored ones.
Did it seem complicated? Of course, it will look complicated. Maybe you just tried to connect the components you randomly placed on the canvas, but you just had no luck? It is very normal not to immediately understand which component to put where, where to connect it, and moreover, why we are doing all this. As you gradually gain experience, everything will start to make more sense.
Today, the interface continued. We will move on with the first example.
- Grasshopper: https://www.grasshopper3d.com/
- Grasshopper: https://www.designcoding.net/category/tools-and-languages/grasshopper/
Source URL: https://www.designcoding.net/interface-continued-grasshopper-for-beginners-5/