Image Sampler Basics
by Tuğrul Yazar | July 5, 2024 21:54
The Image Sampler has always been a very effective Grasshopper component. Once again, I had the opportunity to use this component for a professional job. As you can see, with the help of a straightforward and short script, we can create a relief of an image to fit the desired panel dimensions on the screen. We can process this onto a suitable material using a CNC mill, laser cutter, or water jet. For the beginners, here are the image sampler basics again in Grasshopper:
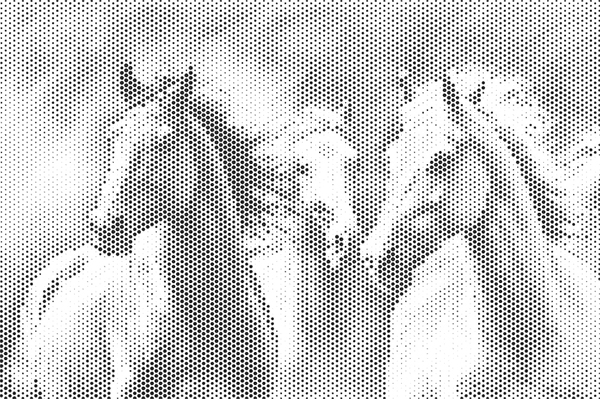
The script first creates a hexagonal grid base. We ensure that the proportions of the grid are close to the proportions of the image file we will use. Then, using the Image Sampler component, we import the image into Grasshopper. We obtain an output based on the black-and-white balance of each pixel. Since the image I used will be processed onto a panel with dimensions of 65×35, I adjusted my image to these proportions in Photoshop beforehand. In the Image Sampler component, I set the X and Y domain sections to 0 to 65 and 0 to 35. Thus, I included the entire image in the calculation. The data I obtained gave the black-and-white tone that should be at the points of the hexagonal grid as a value between 0 and 1. Using this value, I determined the radii of the circles on the grid.

You can rebuild the definition by looking at the diagram above. You can also visit to see an older version of the code here[1]. However, if you want to support my website by downloading my working Grasshopper files; would you consider being my Patreon? Here is the link to my Patreon page[2] including the Grasshopper files for the Image Sampler Basics and more. Thank you.

- here: https://www.designcoding.net/image-sampler-revisited/
- Here is the link to my Patreon page: https://www.patreon.com/Designcoding
Source URL: https://www.designcoding.net/image-sampler-basics/